
Connect your email (Gmail)

You'll do 2 things
- Confirm forwarding in Gmail to your secure Finvot alias.
- Create a filter so only transaction emails are forwarded to Finvot.
⌛ Estimated time: 5 minutes
0. Before you start
- Identify which email inbox receives your bank notifications (Gmail, Outlook, Apple Mail, or another).
Important
Make sure to do this setup from a computer (laptop or desktop) using a web browser. This setup CANNOT be done from phones or mobile apps (Gmail app, Outlook app, etc.).
This guide only covers GMAIL. If you need to set up a different email, go to the matching documentation.
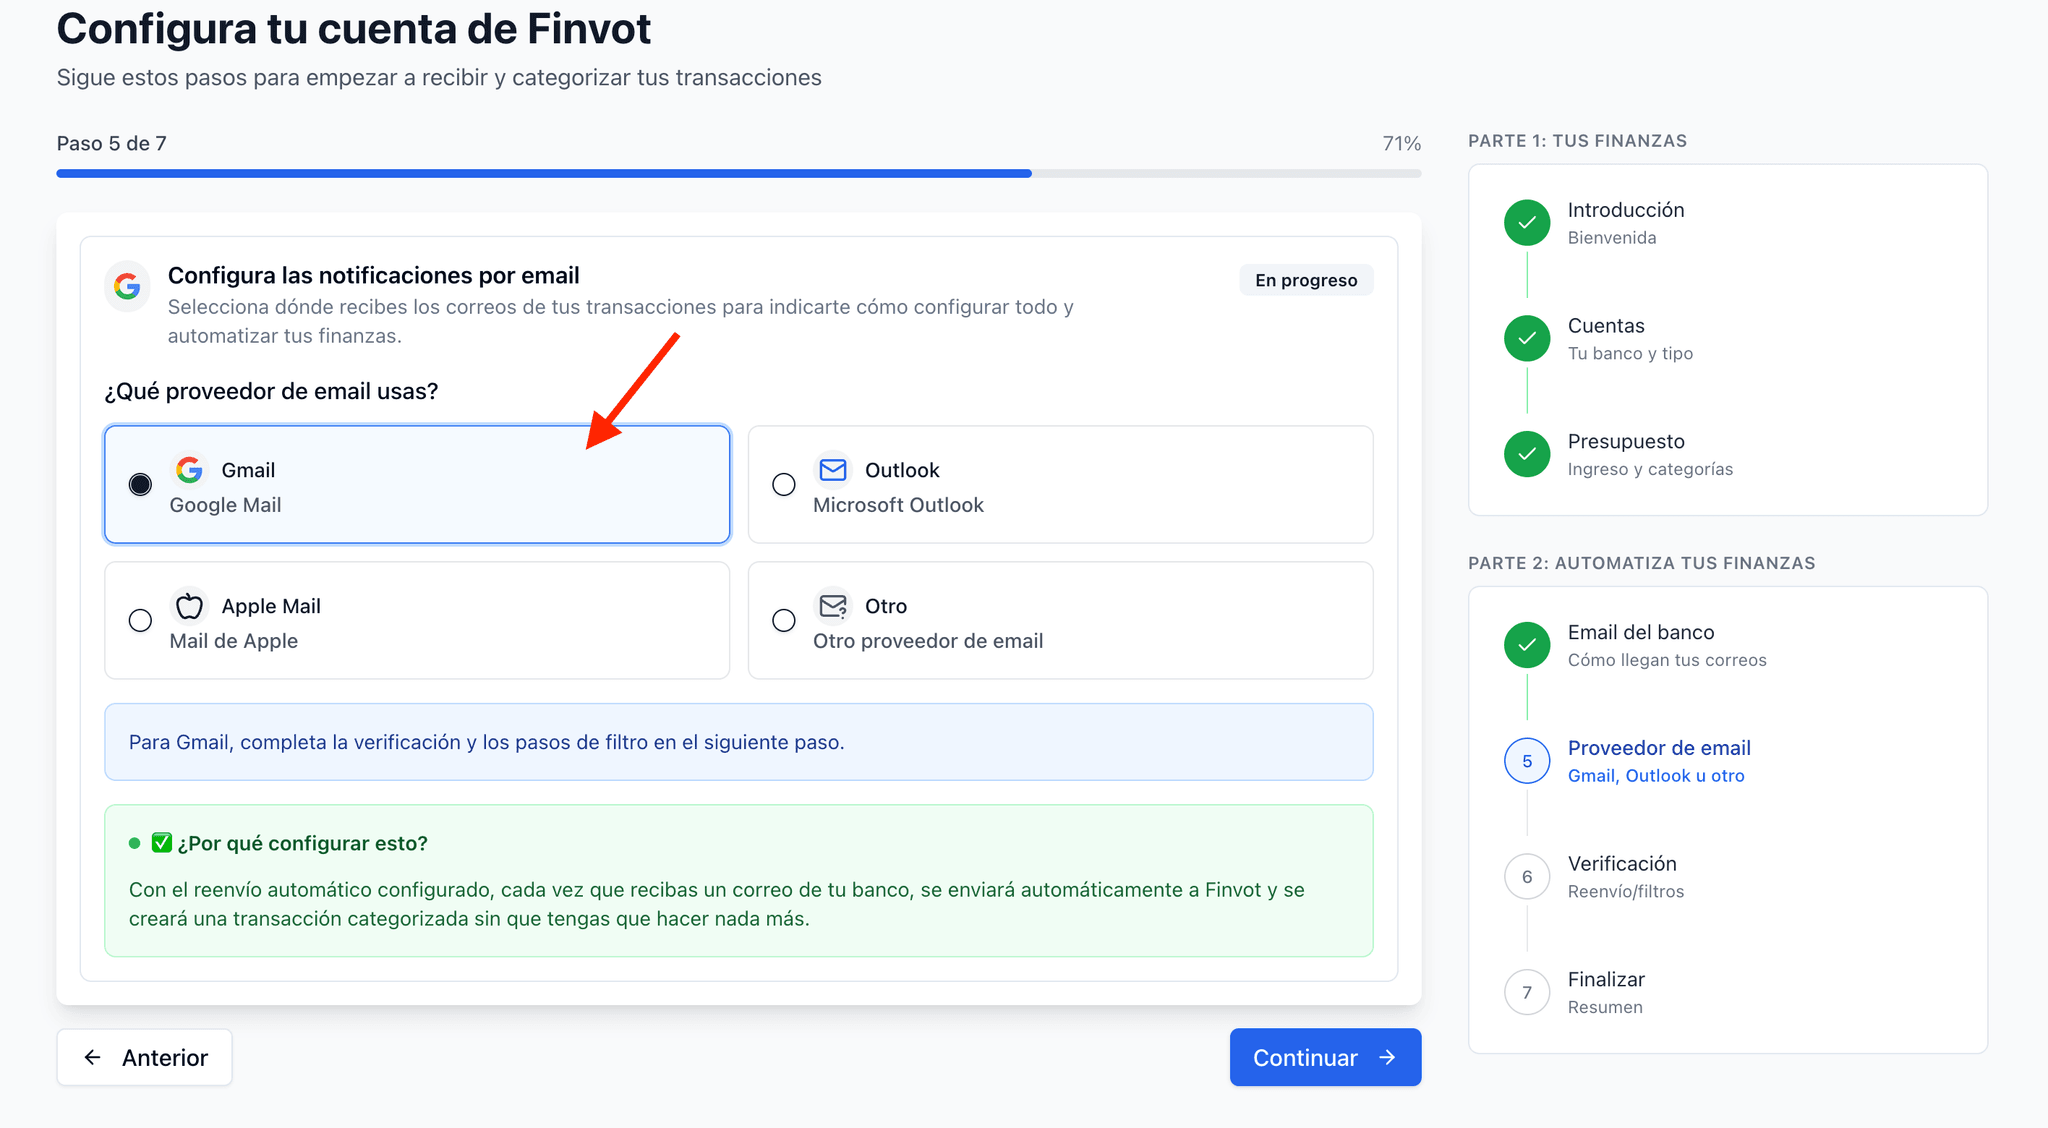
a) In the initial onboarding, select Gmail as your provider
During the initial onboarding, you'll see a screen to choose your email provider. Select Gmail.
b) Copy your unique Finvot alias
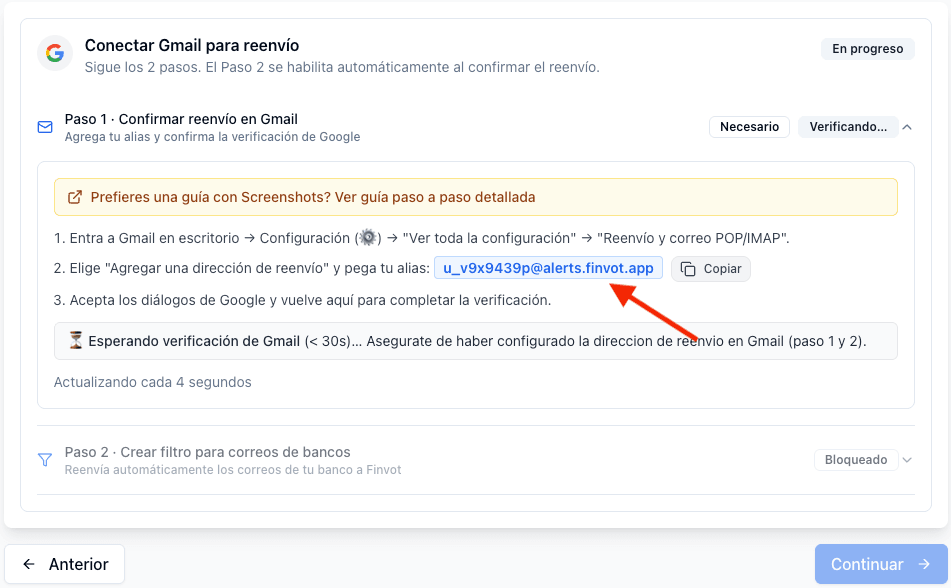
During onboarding in Finvot you'll see your personal alias, which looks like this: <your_alias>@alerts.finvot.app. This alias is unique to your account and lets Finvot receive your emails securely and automatically.
Step 1 · Confirm forwarding in Gmail
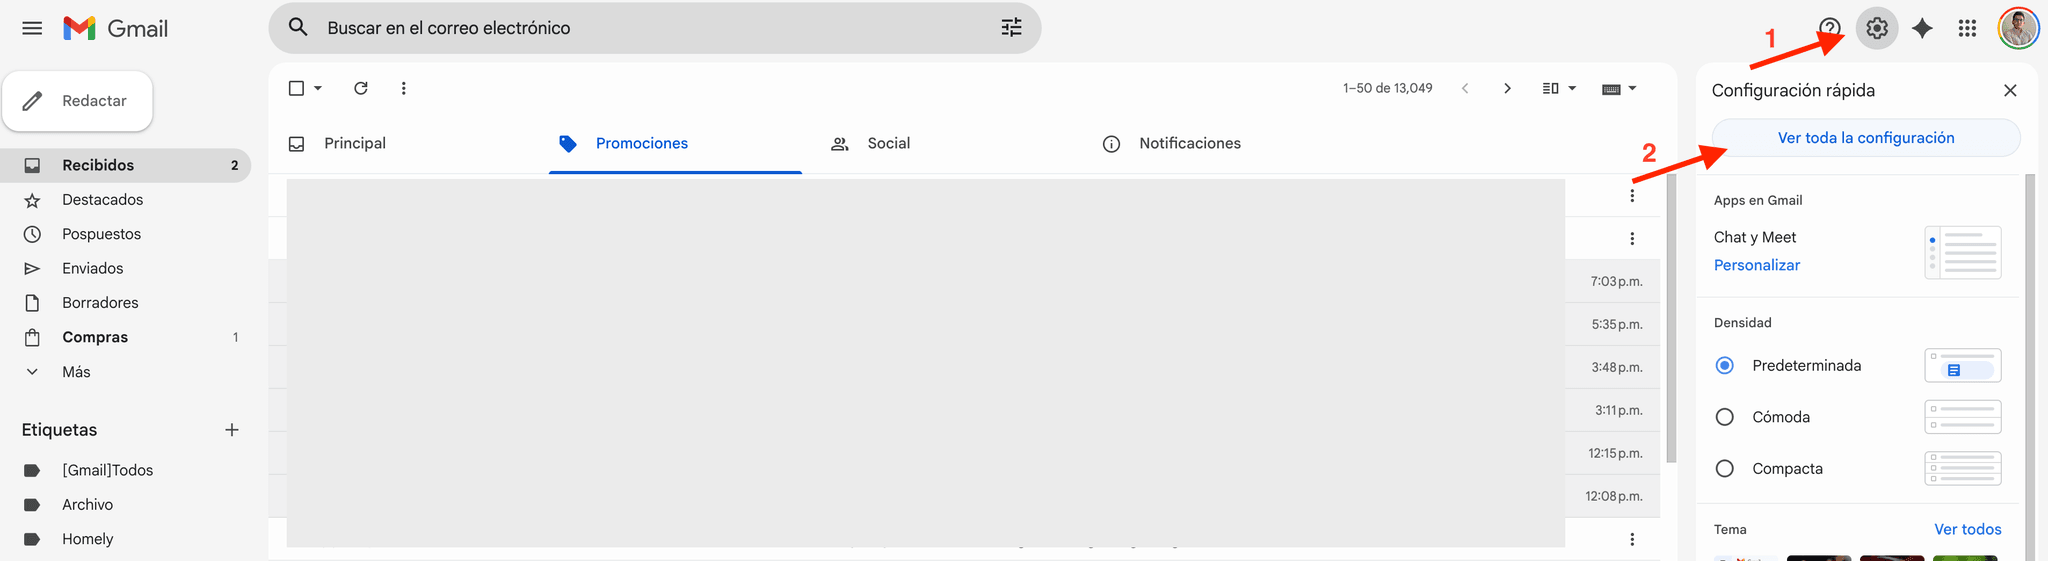
Open Gmail on a computer (web)
Open Settings (⚙️) → See all settings
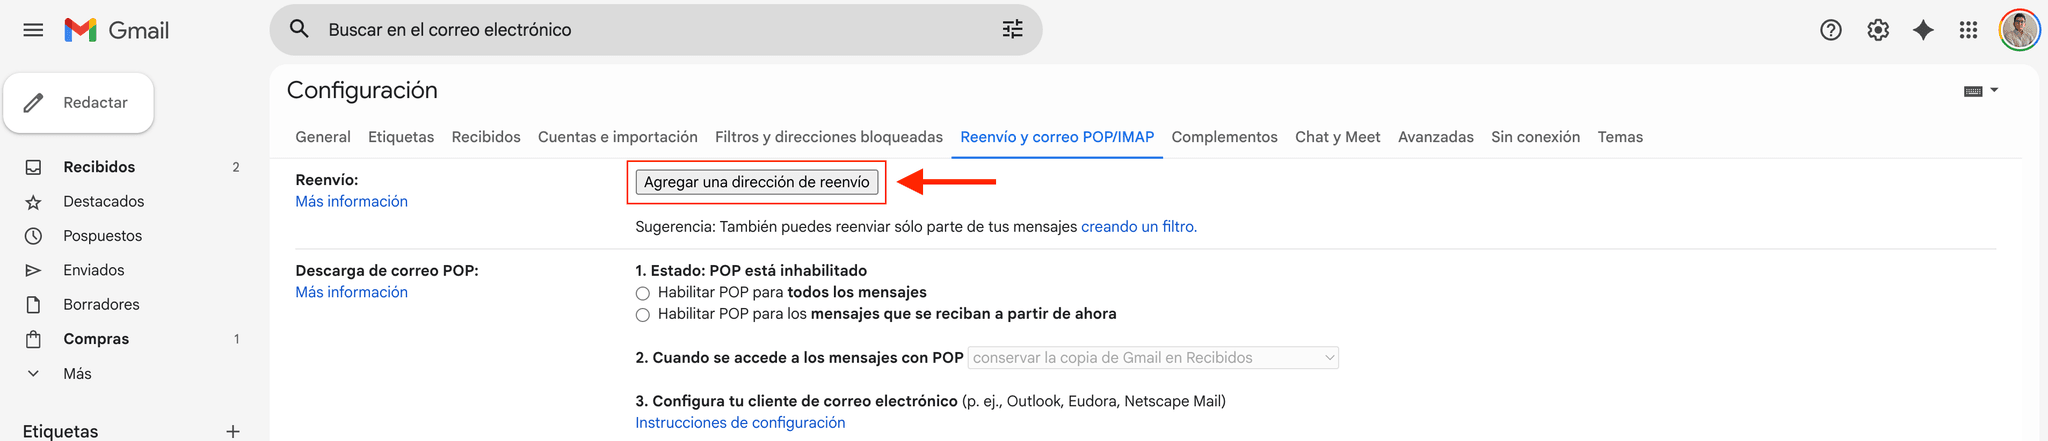
Go to the Forwarding and POP/IMAP tab
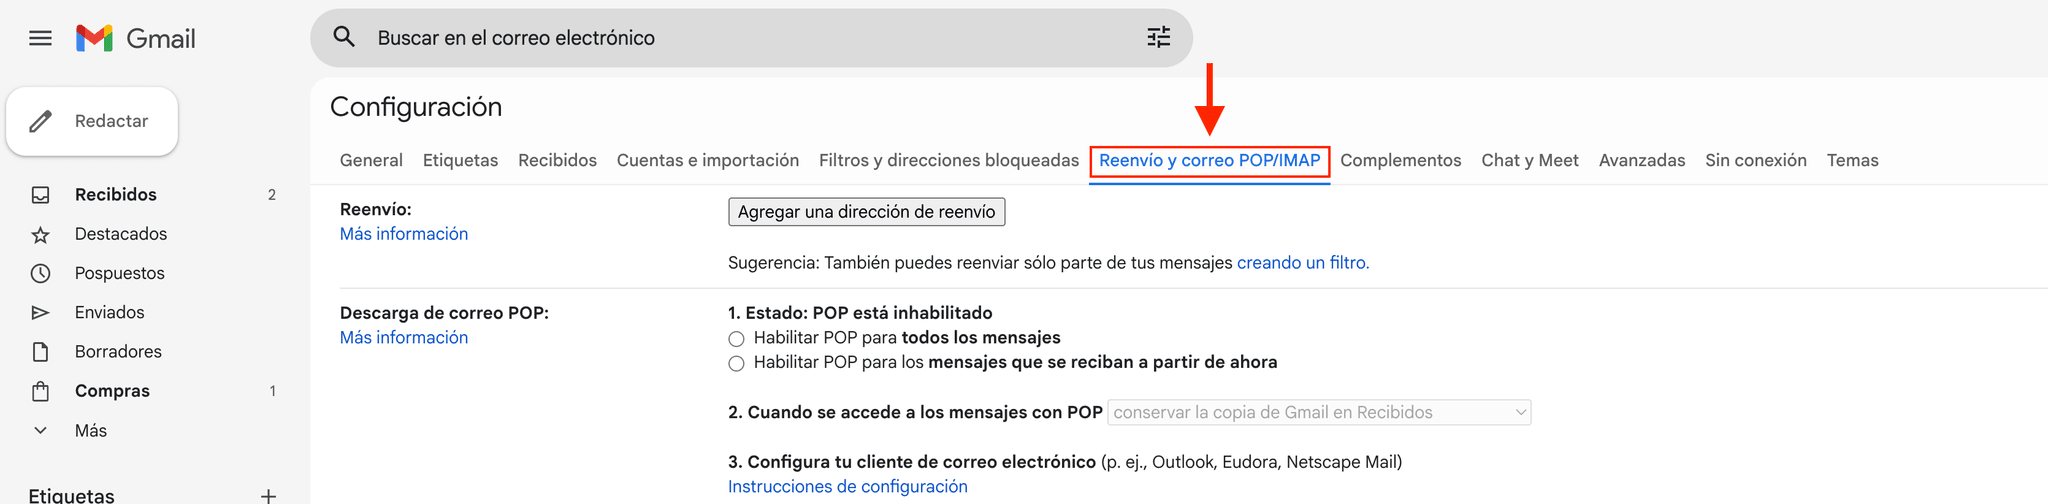
Add a forwarding address
Paste your Finvot alias
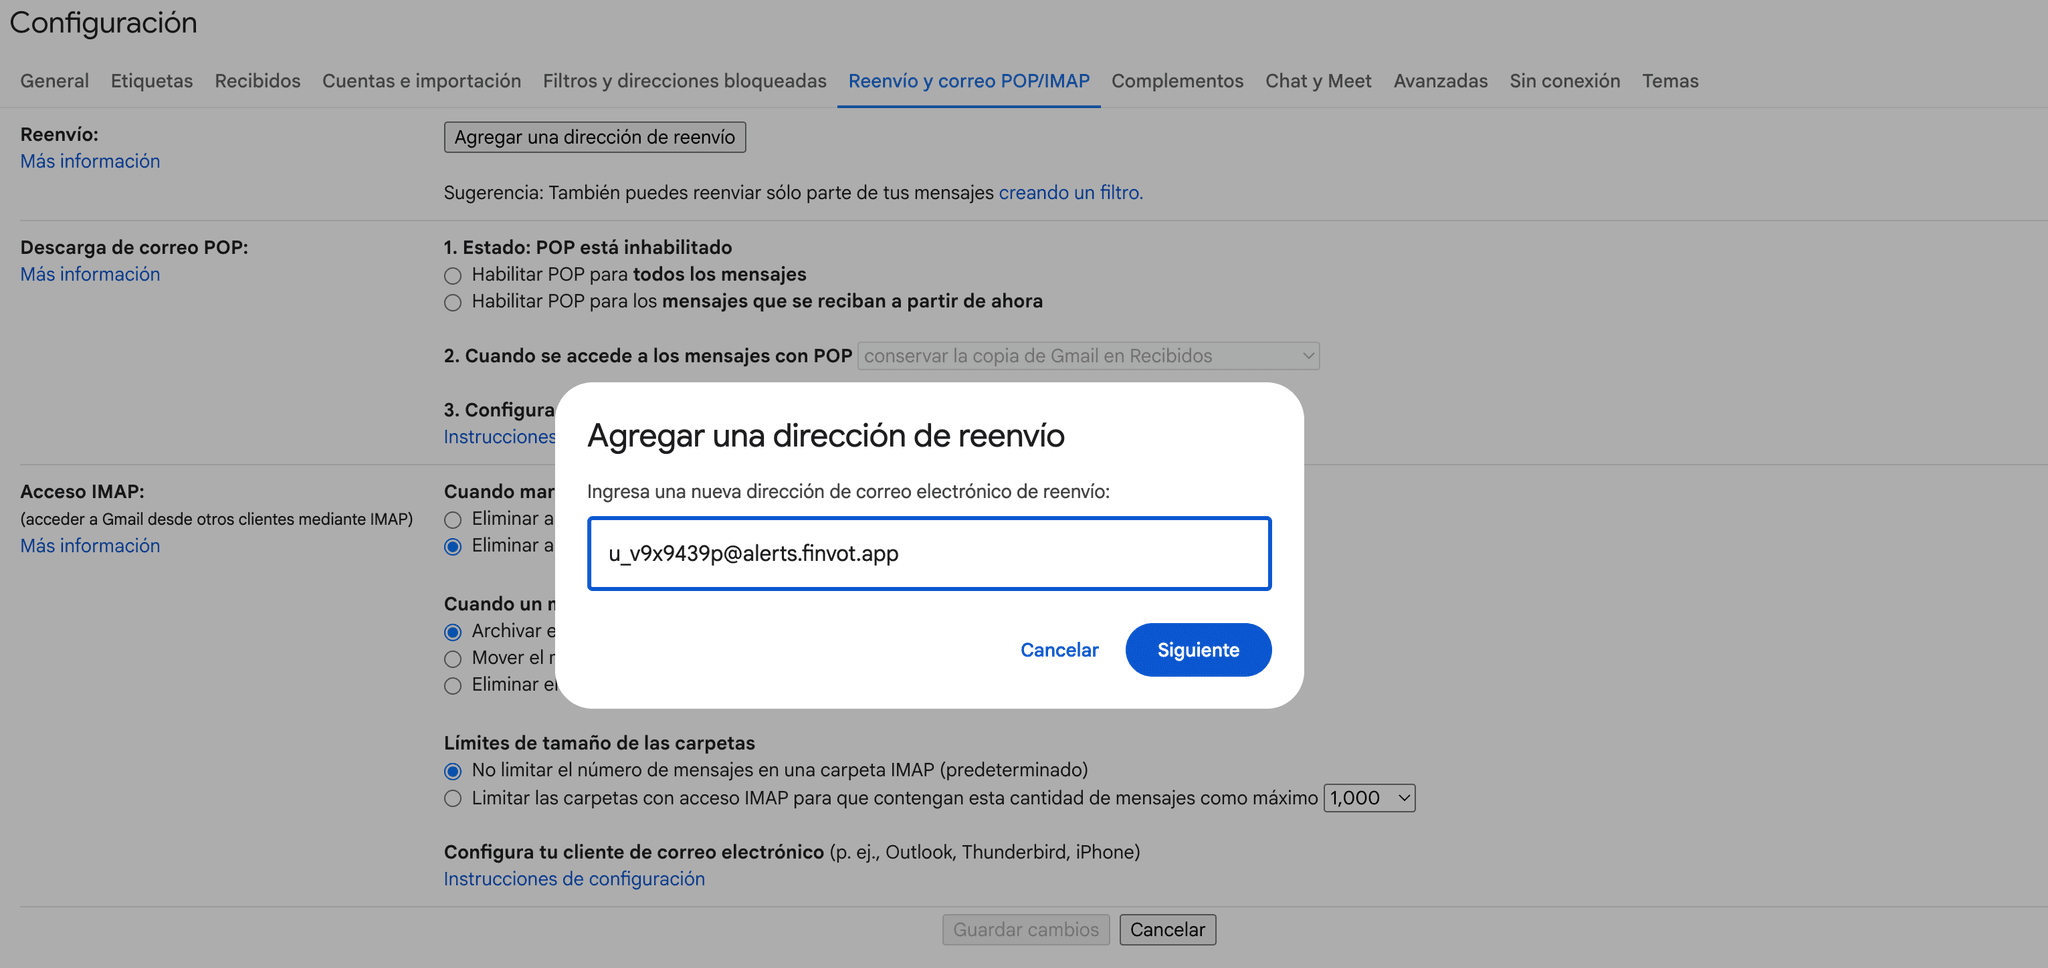
Remember you can copy your alias at any time from the Finvot screen.
Accept Google's messages
It may ask for identity verification.
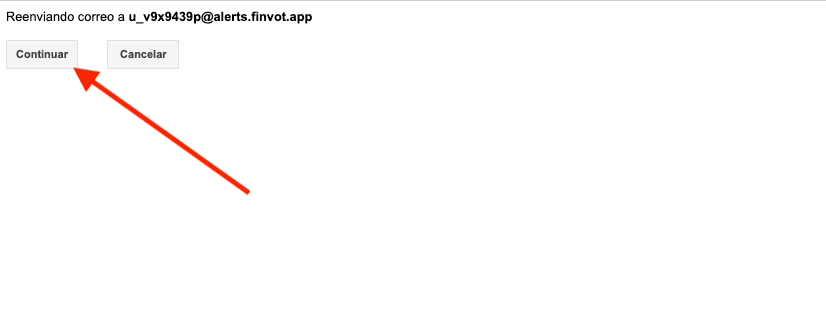
Click “Continue”
It appears small, in the top-left corner.
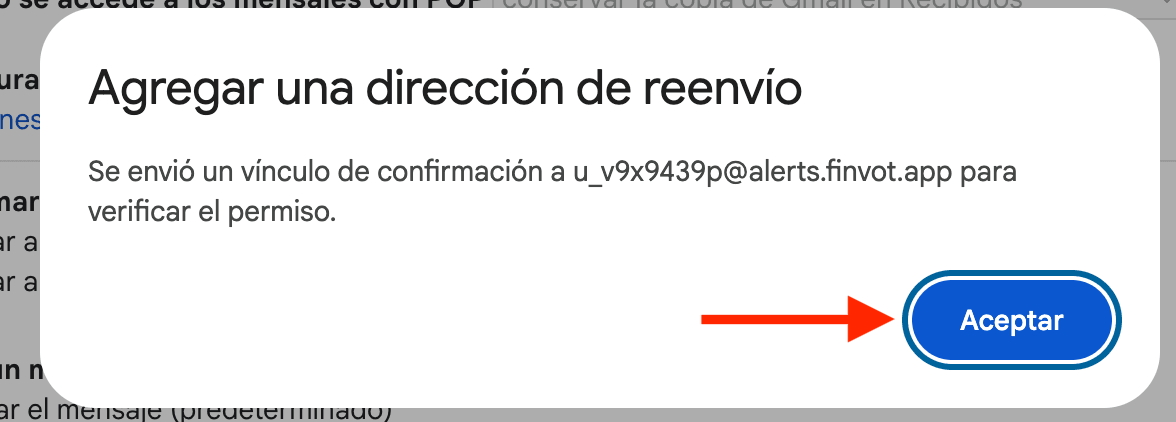
Accept the confirmation
Open verification in Finvot
Go back to the Finvot tab and click the black Open verification button.
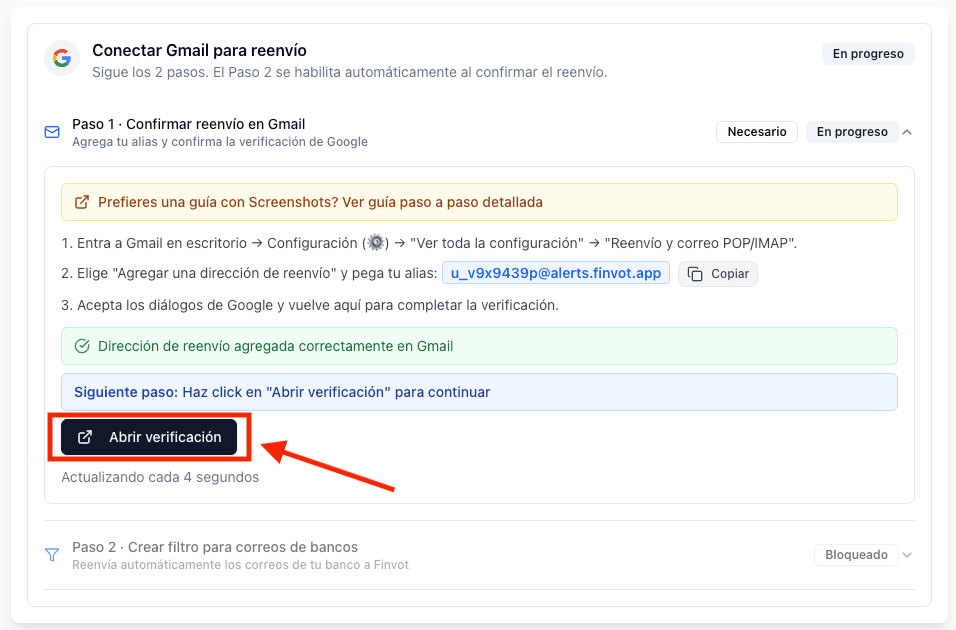
If it doesn't appear yet, wait a few seconds.
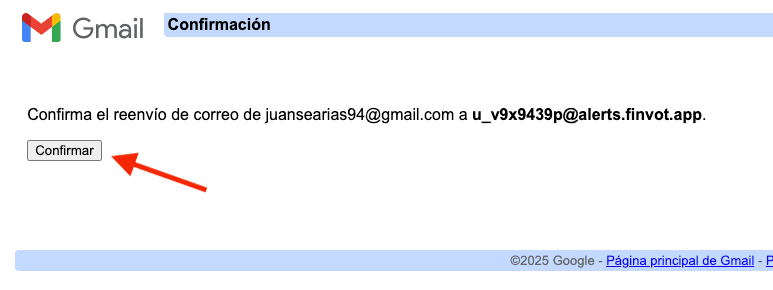
Confirm on the Google screen
Once confirmed, you can close that window.
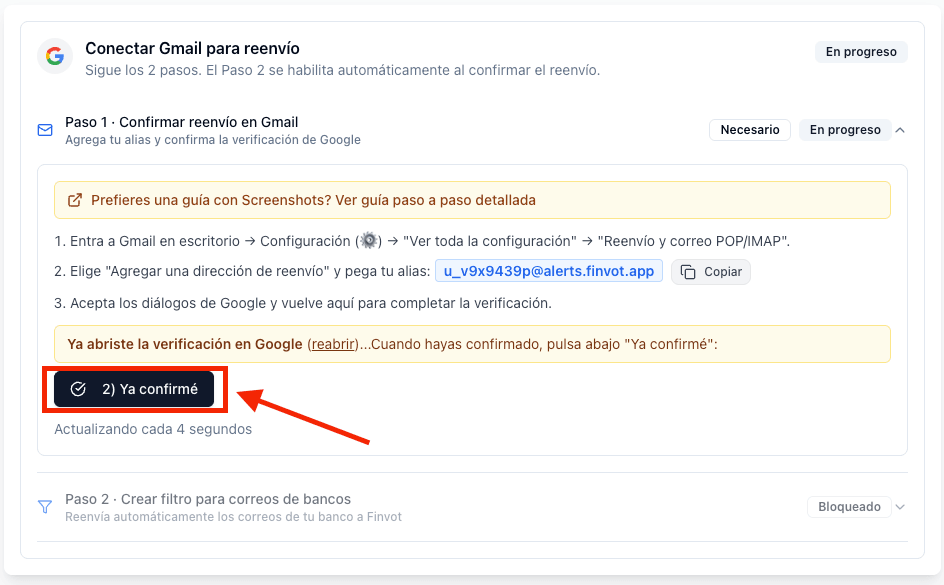
Go back to Finvot and tap “I've confirmed”
✅ Expected result
Gmail now recognizes your Finvot alias as a valid forwarding address.
Step 2 · Create a filter for your bank emails
(This step is enabled after you complete Step 1.)
Refresh the Gmail page
So Google picks up the changes you just made.
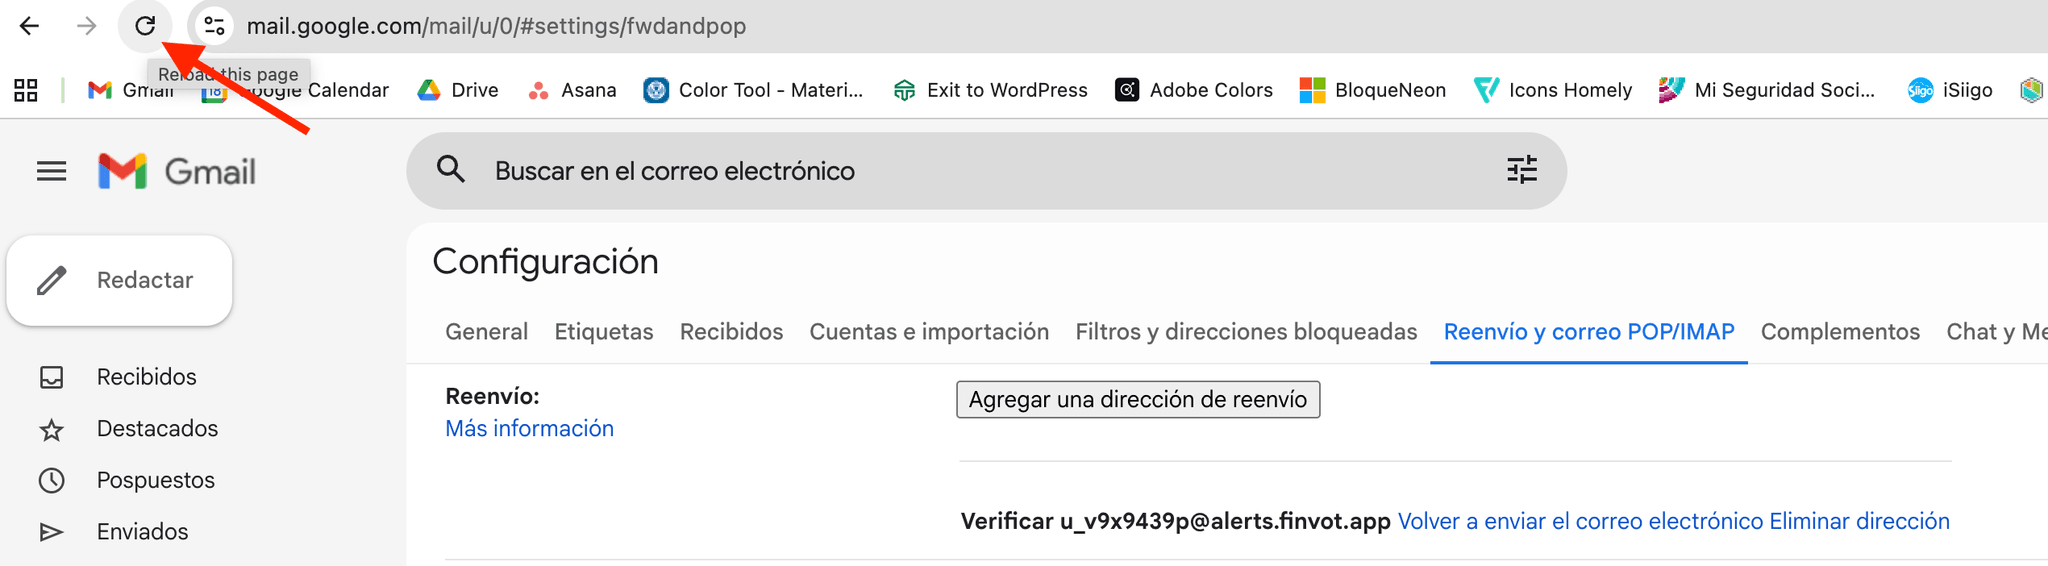
Go back to Settings (⚙️) → See all settings
Go to the Filters and blocked addresses tab

Click Create a new filter

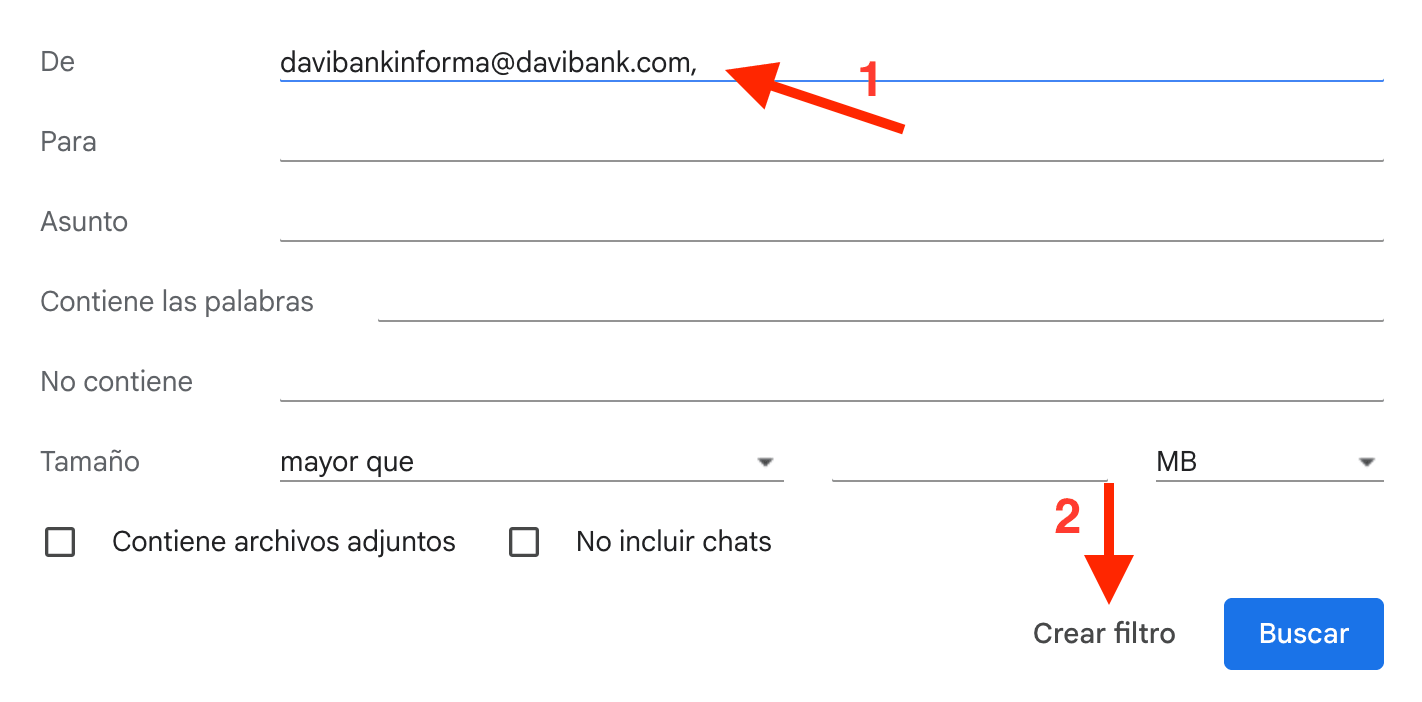
Enter the bank email in the “From” field
Use the exact address your bank uses to send alerts. Examples:
alertasynotificaciones@notificacionesbancolombia.comcolpatriaInforma@scotiabankcolpatria.comDAVIBankInforma@davibank.com
Quick tip
If you're unsure of the “From” address, open an old bank alert email and copy the sender's exact address.
NOTE: If you use Bancolombia, you usually need to add more than one address. It should look like this:
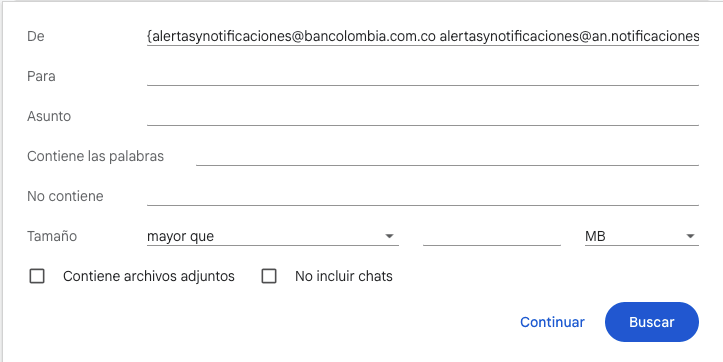
If you don't use Bancolombia, continue to the next step. You can copy and paste these Bancolombia addresses we've already identified (copy them exactly, including the {} braces):
{alertasynotificaciones@bancolombia.com.co alertasynotificaciones@an.notificacionesbancolombia.com alertasynotificaciones@ayn.notificacionesbancolombia.com alertasynotificaciones@notificacionesbancolombia.com}Click Create filter
Check “Forward it to:” and select your Finvot alias
It should already appear in the options since you added it in Step 1.
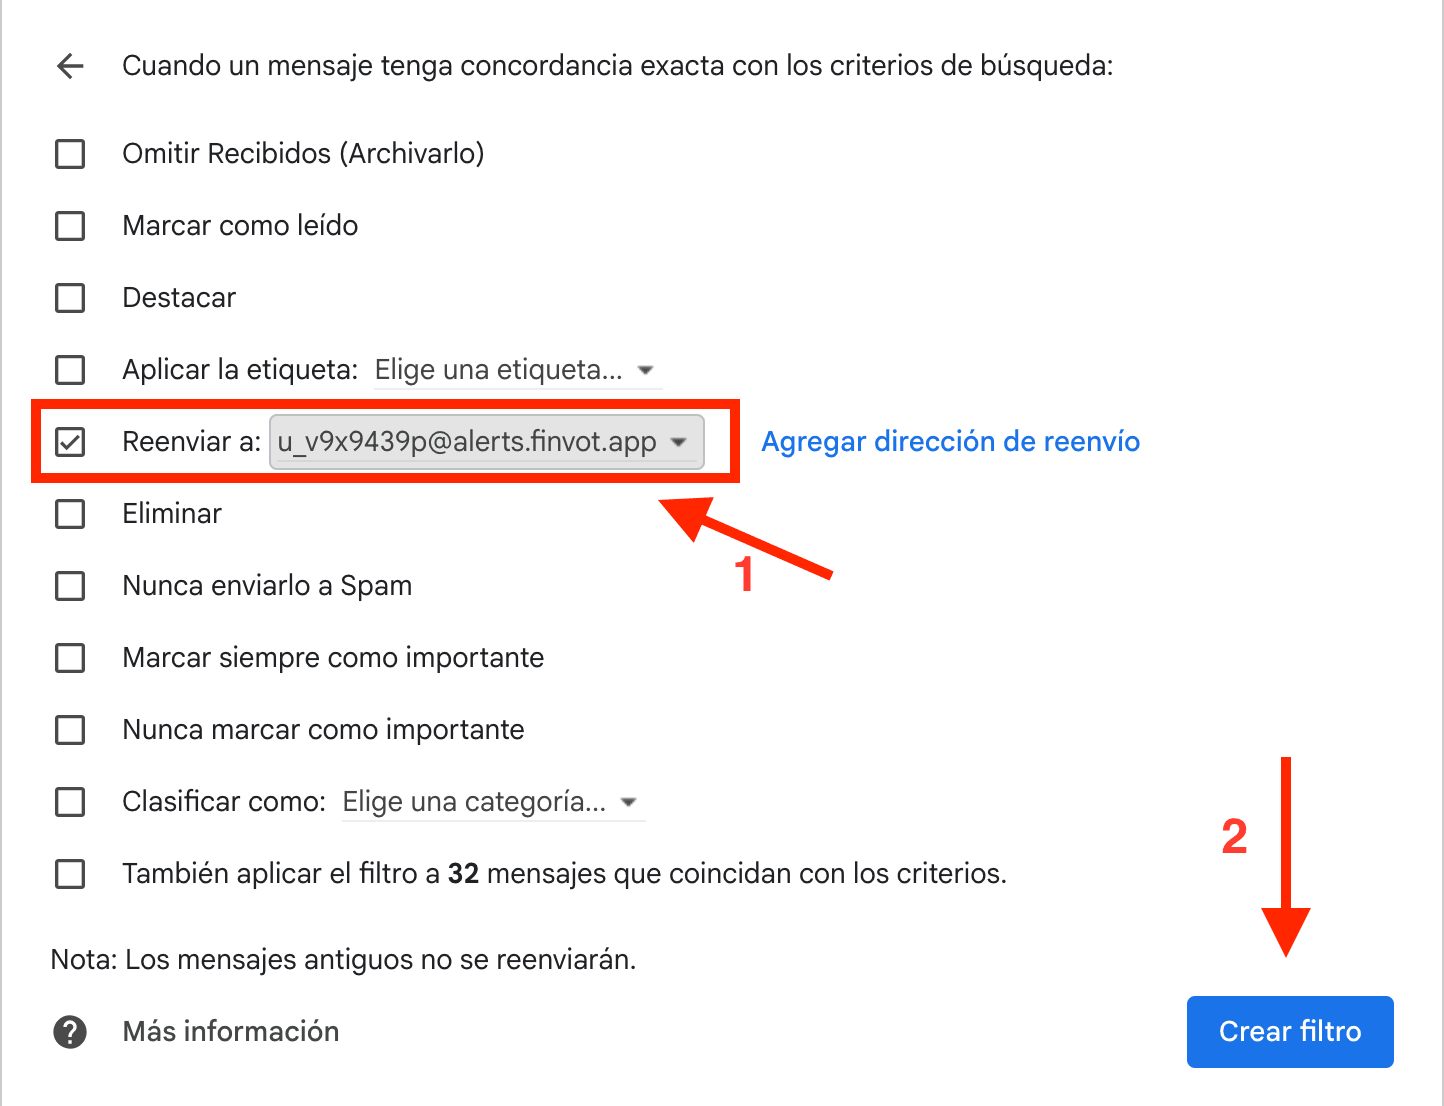
Confirm with “Create filter”
Google will likely ask you to verify your identity again.
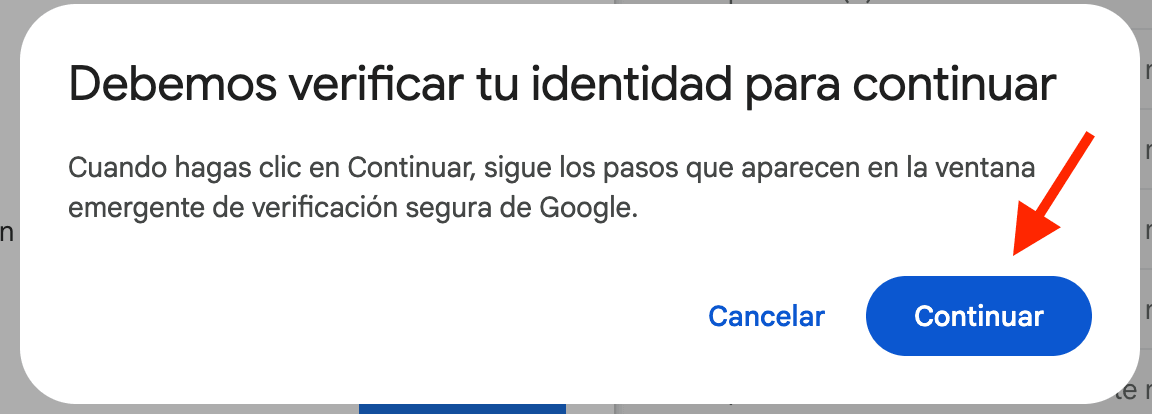
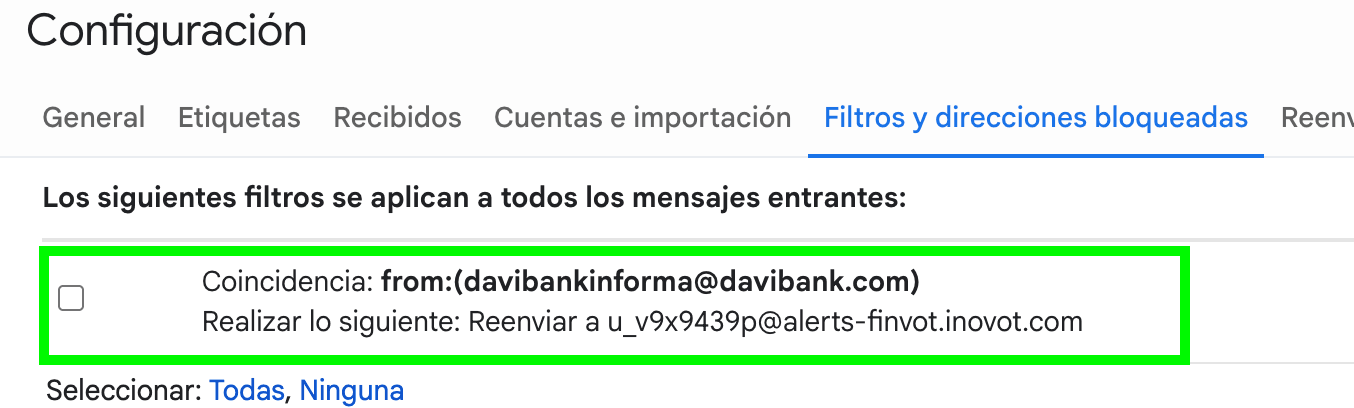
Verify the filter looks right
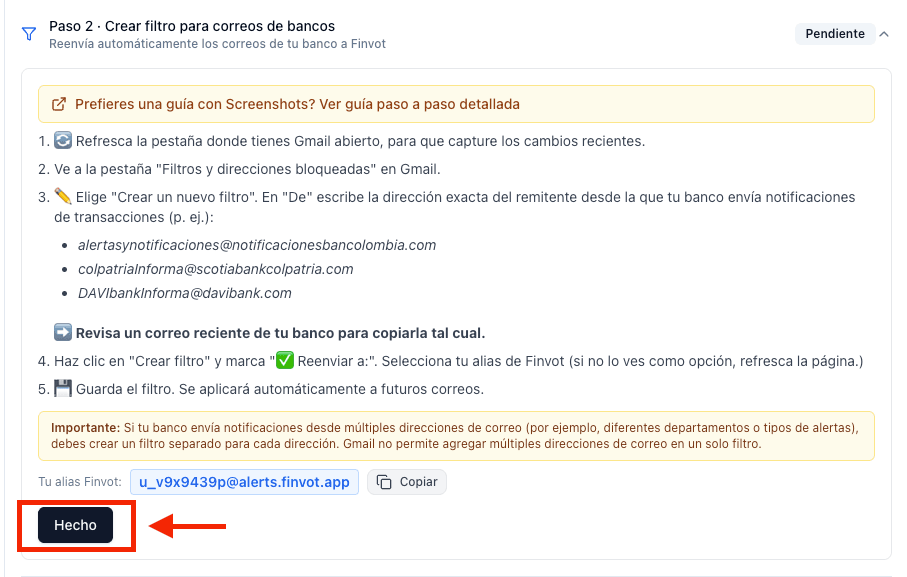
Go back to Finvot and press “Done”
All set! 🎉
From now on, Finvot will automatically receive your bank emails, process each transaction with AI, and update your income and expenses in the dashboard without you doing a thing.
Note
Over the next few days Gmail may show you an alert or notice. That's fine — it's just letting you know that some emails are being forwarded automatically to Finvot.

If your bank uses multiple addresses (important)
If your bank sends alerts from more than one address, create a separate filter for each one.
- ⚠️ Gmail does not allow several different addresses in a single filter using the “From” field.
- ✅ Quick tip: if you're unsure of the “From” address, open a bank alert email and copy the sender's exact address.